頂点シェーダー
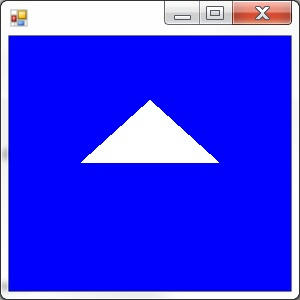
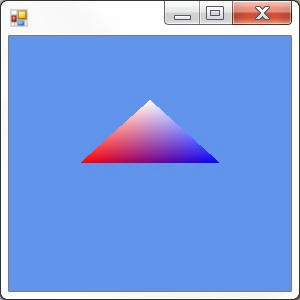
前々回は白い三角形、前回は3色三角形を描きました。


両方共三角形は全く動きません。
静止画でした。
今回はこの三角形を動かしてみたいと思います。
アニメーションです。


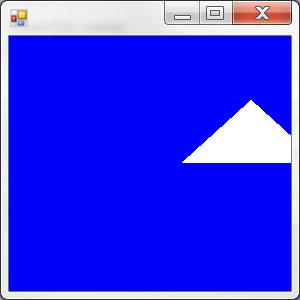
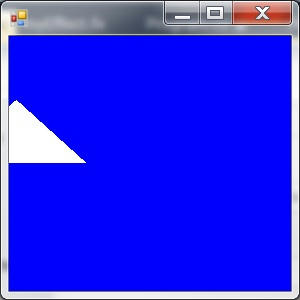
上の静止画2つだけでは動いているように見えませんが、ともかくアニメーションするのです。
横にゆらゆら揺れます。
かんが妙に鋭い人は
「フームなるほど。ビューポートを動かして描くんだな。そうすれば三角形が描かれる場所をコントロールできる」
と思われるでしょうが、違います。
あるいは
「いやこういうことだな。頂点バッファの中に入っている頂点データを書き換えていくんだ。そうすれば三角形が動いたように見えるはず」
こちらはある意味正しくいい線行っています。
もちろんビューポートを動かしても全く同じ結果が得られるでしょうが、
ここでやる方法はそれよりはるかに柔軟性のある方法です。
頂点シェーダーを使って頂点の情報をいじくり回すのです。
この方法を応用すれば三角形を回転させたり、遠近法の効果を付け加えることも可能です。
ここでは話を簡単にするために、平行移動みたいな簡単なことをするのです。
頂点バッファの書き換えがある意味正しいといったのは、頂点シェーダーがまさにバッファのデータをいじくりまわしているからです。
「ある意味」という言い方をしたのは、実は頂点シェーダーの中に入っているデータそのものは変わらないということです。
そのものではなく、データのコピーが変えられるのです。
頂点バッファはあまり頻繁にデータを書き換えするのには向いていません。
CPU側からデバイスにあるデータ(バッファ)を書き換えるのには時間がかかるのです。
今回するのは、頂点バッファのデータを元にちょっと変更を加えて描画にのみ利用する方法です。
頂点バッファそのもののデータは変わりません。
コード
Program.cs
using SlimDX;
using SlimDX.Direct3D11;
using SlimDX.DXGI;
using SlimDX.D3DCompiler;
class Program
{
static void Main()
{
using (Game game = new MyGame())
{
game.Run();
}
}
}
class MyGame : Game
{
Effect effect;
InputLayout vertexLayout;
Buffer vertexBuffer;
protected override void Draw()
{
GraphicsDevice.ImmediateContext.ClearRenderTargetView(
RenderTarget,
new SlimDX.Color4(1, 0, 0, 1)
);
initTriangleInputAssembler();
setTriangleTranslation();
drawTriangle();
SwapChain.Present(0, PresentFlags.None);
}
private void initTriangleInputAssembler()
{
GraphicsDevice.ImmediateContext.InputAssembler.InputLayout = vertexLayout;
GraphicsDevice.ImmediateContext.InputAssembler.SetVertexBuffers(
0,
new VertexBufferBinding(vertexBuffer, sizeof(float) * 3, 0)
);
GraphicsDevice.ImmediateContext.InputAssembler.PrimitiveTopology
= PrimitiveTopology.TriangleList;
}
private void setTriangleTranslation()
{
double time = System.Environment.TickCount / 500d;
effect.GetVariableByName("TranslationX")
.AsScalar().Set((float)System.Math.Cos(time));
}
private void drawTriangle()
{
effect.GetTechniqueByIndex(0).GetPassByIndex(0).Apply(GraphicsDevice.ImmediateContext);
GraphicsDevice.ImmediateContext.Draw(3, 0);
}
protected override void LoadContent()
{
initEffect();
initVertexLayout();
initVertexBuffer();
}
private void initEffect()
{
using (ShaderBytecode shaderBytecode = ShaderBytecode.CompileFromFile(
"myEffect.fx", "fx_5_0",
ShaderFlags.None,
EffectFlags.None
))
{
effect = new Effect(GraphicsDevice, shaderBytecode);
}
}
private void initVertexLayout()
{
vertexLayout = new InputLayout(
GraphicsDevice,
effect.GetTechniqueByIndex(0).GetPassByIndex(0).Description.Signature,
new[] {
new InputElement
{
SemanticName = "SV_Position",
Format = Format.R32G32B32_Float
}
}
);
}
private void initVertexBuffer()
{
vertexBuffer = MyDirectXHelper.CreateVertexBuffer(
GraphicsDevice,
new[] {
new SlimDX.Vector3(0, 0.5f, 0),
new SlimDX.Vector3(0.5f, 0, 0),
new SlimDX.Vector3(-0.5f, 0, 0),
});
}
protected override void UnloadContent()
{
effect.Dispose();
vertexLayout.Dispose();
vertexBuffer.Dispose();
}
}
class Game : System.Windows.Forms.Form
{
public SlimDX.Direct3D11.Device GraphicsDevice;
public SwapChain SwapChain;
public RenderTargetView RenderTarget;
public void Run()
{
initDevice();
SlimDX.Windows.MessagePump.Run(this, Draw);
disposeDevice();
}
private void initDevice()
{
MyDirectXHelper.CreateDeviceAndSwapChain(
this, out GraphicsDevice, out SwapChain
);
initRenderTarget();
initViewport();
LoadContent();
}
private void initRenderTarget()
{
using (Texture2D backBuffer
= SlimDX.Direct3D11.Resource.FromSwapChain<Texture2D>(SwapChain, 0)
)
{
RenderTarget = new RenderTargetView(GraphicsDevice, backBuffer);
GraphicsDevice.ImmediateContext.OutputMerger.SetTargets(RenderTarget);
}
}
private void initViewport()
{
GraphicsDevice.ImmediateContext.Rasterizer.SetViewports(
new Viewport
{
Width = ClientSize.Width,
Height = ClientSize.Height,
}
);
}
private void disposeDevice()
{
UnloadContent();
RenderTarget.Dispose();
GraphicsDevice.Dispose();
SwapChain.Dispose();
}
protected virtual void Draw() { }
protected virtual void LoadContent() { }
protected virtual void UnloadContent() { }
}
class MyDirectXHelper
{
public static void CreateDeviceAndSwapChain(
System.Windows.Forms.Form form,
out SlimDX.Direct3D11.Device device,
out SlimDX.DXGI.SwapChain swapChain
)
{
SlimDX.Direct3D11.Device.CreateWithSwapChain(
DriverType.Hardware,
DeviceCreationFlags.None,
new SwapChainDescription
{
BufferCount = 1,
OutputHandle = form.Handle,
IsWindowed = true,
SampleDescription = new SampleDescription
{
Count = 1,
Quality = 0
},
ModeDescription = new ModeDescription
{
Width = form.ClientSize.Width,
Height = form.ClientSize.Height,
RefreshRate = new SlimDX.Rational(60, 1),
Format = Format.R8G8B8A8_UNorm
},
Usage = Usage.RenderTargetOutput
},
out device,
out swapChain
);
}
public static Buffer CreateVertexBuffer(
SlimDX.Direct3D11.Device graphicsDevice,
System.Array vertices
)
{
using (SlimDX.DataStream vertexStream
= new SlimDX.DataStream(vertices, true, true))
{
return new Buffer(
graphicsDevice,
vertexStream,
new BufferDescription
{
SizeInBytes= (int)vertexStream.Length,
BindFlags = BindFlags.VertexBuffer,
}
);
}
}
}
myEffect.fx
float TranslationX;
float4 MyVertexShader(float4 position : SV_Position) : SV_Position
{
return position + float4(TranslationX, 0, 0, 0);
}
float4 MyPixelShader() : SV_Target
{
return float4(1, 1, 1, 1);
}
technique10 MyTechnique
{
pass MyPass
{
SetVertexShader( CompileShader( vs_5_0, MyVertexShader() ) );
SetPixelShader( CompileShader( ps_5_0, MyPixelShader() ) );
}
}
このプログラムで一番重要なのはHLSLの変数TranslationXです。 この値が三角形を横に動かします。 TranslationXはC#側のコードによって値がセットされます。 値はMath.Sinに時間が引数になったもの。 つまりTranslationXは時とともに増えたり減ったりします。 それがHLSL側で頂点の座標に足されます。 つまりゆらゆらと横に揺れるようになるのです。 頂点バッファのデータそのものを変えなくても、違った描き方をすることができる。 それが頂点シェーダーです。


HLSLの変数を書き換える 今回のサンプルでやったことは、C#側からHLSL側の変数の書き換えを行うというものでした。 書き換えの結果三角形が動くのです。 それにはHLSL側の変数を操作するためのクラスが必要です。 それがSlimDX.Direct3D11.EffectVariableクラスです。
public class EffectVariable
このオブジェクトはEffect.GetVariableByName()メソッドにより取得します。
public EffectVariable GetVariableByName(string name);
nameはHLSLファイルに書いた変数の名前です。
戻り値はEffectVariableのインスタンスです。
EffectVariableは変数を司るものです。
HLSLの変数を読み書きします。
ただ、どんな変数も読み書きしなくてはならないので、型情報がありません。
この変数がfloatなのか、Vector3なのか、テクスチャなのかマトリクスなのか…
使う前に、まずそれをはっきりさせる必要があります。
それにはEffectVariaible.AsXXX()という形式のメソッドを使います。
このメソッドに引数はありません。
戻り値は型と関連付けられたEffectVariableの派生クラスです。
|
メソッド名 |
戻り値 |
|
AsBlend |
EffectBlendVariable |
|
AsClassInstance |
EffectClassInstanceVariable |
|
AsConstantBuffer |
EffectConstantBuffer |
|
AsDepthStencil |
EffectDepthStencilVariable |
|
AsDepthStencilView |
EffectDepthStencilViewVariable |
|
AsInterface |
EffectInterfaceVariable |
|
AsMatrix |
EffectMatrixVariable |
|
AsRasterizer |
EffectRasterizerVariable |
|
AsRenderTargetView |
EffectRenderTargetViewVariable |
|
AsResource |
EffectResourceVariable |
|
AsSampler |
EffectSamplerVariable |
|
AsScalar |
EffectScalarVariable |
|
AsShader |
EffectShaderVariable |
|
AsString |
EffectStringVariable |
|
AsUnorderedAccessView |
EffectUnorderedAccessViewVariable |
|
AsVector |
EffectVectorVariable |
今回はfloatの変数を書き換えるので、AsScalar()メソッドを使います。
戻り値はSlimDX.Direct3D11.EffectScalarVariableです。
このクラスを使うとHLSL側のfloat変数に書き込みができます。
書き込みにはEffectScalarVariable.Set()メソッドを使います。
public Result Set(float value);
valueは変数にセットする値です。
こうしてC#側で用意した値をHLSL側に書き込めます。
HLSLでは描画に使われる頂点データにアクセスできるので、描くものをアニメーションすることができるのです。
