[PR]
×
[PR]上記の広告は3ヶ月以上新規記事投稿のないブログに表示されています。新しい記事を書く事で広告が消えます。
プログラミング、3DCGとその他いろいろについて
[PR]上記の広告は3ヶ月以上新規記事投稿のないブログに表示されています。新しい記事を書く事で広告が消えます。
これまで描いてきた図形は全て頂点に色が付いていただけでしたが、
もちろんXNAではテクスチャが描かれた図形を表示することも出来ます。
テクスチャ付きの図形を表示するには、頂点にVertexPositionTexture構造体を使います。
これは色のデータの代わりに、テクスチャのデータ(Vector2)を持っています。
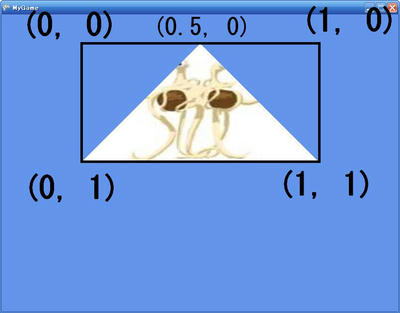
そのデータは1.0 × 1.0のテクスチャ座標上の点を表していて、
表示するテクスチャのどの部分を頂点が表示するかを意味します。
ここら辺はサンプルとその結果を見た方が速いかもしれません。
using Microsoft.Xna.Framework;
using Microsoft.Xna.Framework.Graphics;
using Microsoft.Xna.Framework.Content;


public class MyGame : Microsoft.Xna.Framework.Game
{
    GraphicsDeviceManager graphics;
    BasicEffect effect;

    VertexPositionTexture[] vertices = new VertexPositionTexture[3];

    ContentManager content;
    Texture2D texture;


    public MyGame()
    {
        graphics = new GraphicsDeviceManager(this);
        content = new ContentManager(Services);

        vertices[0] = new VertexPositionTexture(new Vector3(0, 1, 0), new Vector2(0.5f, 0));
        vertices[1] = new VertexPositionTexture(new Vector3(1, 0, 0), new Vector2(1, 1));
        vertices[2] = new VertexPositionTexture(new Vector3(-1, 0, 0), new Vector2(0, 1));
    }

    protected override void LoadGraphicsContent(bool loadAllContent)
    {
        if (loadAllContent)
        {
            effect = new BasicEffect(graphics.GraphicsDevice, null);
            effect.TextureEnabled = true;
            effect.Projection = Matrix.CreatePerspectiveFieldOfView(
                MathHelper.ToRadians(45),
                Window.ClientBounds.Width / (float)Window.ClientBounds.Height,
                1,
                100
                );
            effect.View = Matrix.CreateLookAt(
                new Vector3(0, 0, 3),
                new Vector3(0, 0, 0),
                new Vector3(0, 1, 0)
            );

            texture = content.Load<Texture2D>("FlyingSpaghettiMonster");
        }
    }

    protected override void UnloadGraphicsContent(bool unloadAllContent)
    {
        if (unloadAllContent) { content.Unload(); }
    }

    protected override void Draw(GameTime gameTime)
    {
        graphics.GraphicsDevice.Clear(Color.CornflowerBlue);

        graphics.GraphicsDevice.VertexDeclaration = new VertexDeclaration(
            graphics.GraphicsDevice,
            VertexPositionTexture.VertexElements
            );

        effect.Texture = texture;

        effect.Begin();

        foreach (EffectPass pass in effect.CurrentTechnique.Passes)
        {
            pass.Begin();

            graphics.GraphicsDevice.DrawUserPrimitives <VertexPositionTexture>(
                PrimitiveType.TriangleList,
                vertices,
                0,
                1
                );

            pass.End();
        }

        effect.End();
    }
}
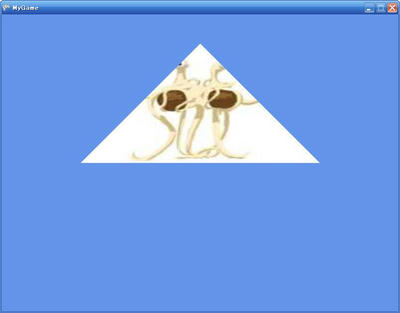
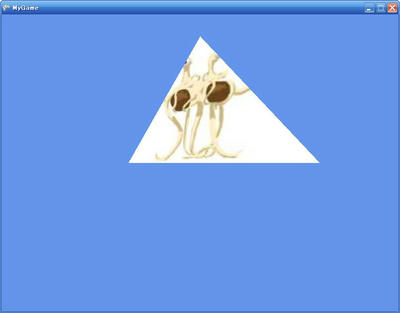
このサンプルでは三角形の中に"FlyingSpaghettiMonster"という画像を表示しています。
3つのそれぞれの頂点は、座標と、画像のどの部分を担当するかのデータを持っています。
そのデータは、画像のサイズを1.0 × 1.0であると考えたときのテクスチャの点の座標で、
その方向は普通のスクリーンの座標と同じように、左上が(0, 0)となっています。
この方法を使えば、複雑なマッピングも行うことが出来ます。
例えば世界地図を球にマップして地球を作ることも出来るのです。
もちろんこの三角形は3Dですからカメラの位置を調節すると遠近感が出ます。
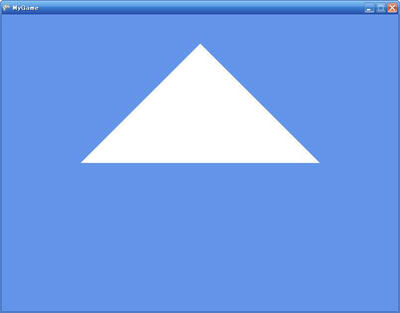
さて、テクスチャを使った三角形を描画する上で忘れがちなのは、
BasicEffect.TextureEnabledプロパティをtrueにセットすることです。
これによってBasicEffectのテクスチャの描画が有効になります。(おそらく内部でエフェクトのテクニックを変更しているのでしょう。(後で確認したところ、どうやら別の方法を使っているようです。))
もしそうしなければ、BasicEffectが描画の時にテクスチャを考慮に入れなくなり、
真っ白の三角形が描かれるのみとなります。
これをする理由は色付きの三角形を表示するときにBasicEffect.VertexColorEnabledプロパティをtrueにした理由と同じです。
こういったプロパティによって、BasicEffectは内部の描画モードを変更しているのです。
 [0回]
[0回]