[PR]
×
[PR]上記の広告は3ヶ月以上新規記事投稿のないブログに表示されています。新しい記事を書く事で広告が消えます。
プログラミング、3DCGとその他いろいろについて
[PR]上記の広告は3ヶ月以上新規記事投稿のないブログに表示されています。新しい記事を書く事で広告が消えます。

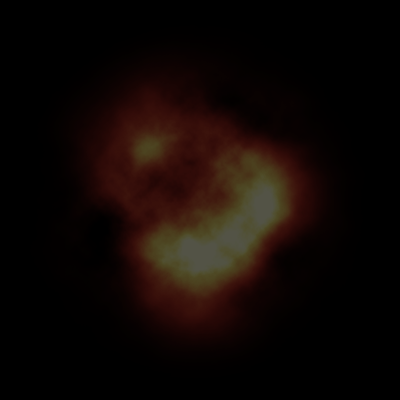 (爆発に使われた画像explosion.png)
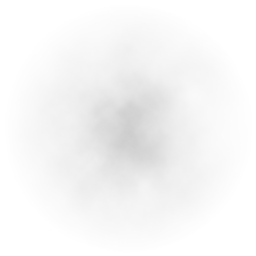 (煙に使われた画像smoke.png)
using Microsoft.Xna.Framework;
using Microsoft.Xna.Framework.Graphics;

class MyGame : Game
{
    GraphicsDeviceManager graphics;
    BasicEffect effect;
    VertexPositionTexture[] vertices = new[]
    {
        new VertexPositionTexture(new Vector3(-1, 1, 0), new Vector2(0, 0)),
        new VertexPositionTexture(new Vector3(1, 1, 0), new Vector2(1, 0)),
        new VertexPositionTexture(new Vector3(1, -1, 0), new Vector2(1, 1)),

        new VertexPositionTexture(new Vector3(-1, 1, 0), new Vector2(0, 0)),
        new VertexPositionTexture(new Vector3(1, -1, 0), new Vector2(1, 1)),
        new VertexPositionTexture(new Vector3(-1, -1, 0), new Vector2(0, 1)),
    };
    Texture2D texture;

    public MyGame()
    {
        graphics = new GraphicsDeviceManager(this);
    }

    protected override void LoadContent()
    {
        effect = new BasicEffect(GraphicsDevice)
        {
            TextureEnabled = true,
            View = Matrix.CreateLookAt
            (
                new Vector3(0, 0, 3),   //カメラの位置
                new Vector3(0, 0, 0),   //カメラの見る点
                new Vector3(0, 1, 0)    //カメラの上向きベクトル
            ),
            Projection = Matrix.CreatePerspectiveFieldOfView
            (
                MathHelper.ToRadians(45),   //視野の角度。ここでは45°
                GraphicsDevice.Viewport.AspectRatio,//画面のアスペクト比(=横/縦)
                1,      //カメラからこれより近い物体は画面に映らない
                100     //カメラからこれより遠い物体は画面に映らない
            )
        };
        texture = Content.Load<Texture2D>("Content/explosion");
    }

    protected override void UnloadContent()
    {
        effect.Dispose();
    }

    protected override void Draw(GameTime gameTime)
    {
        GraphicsDevice.Clear(Color.CornflowerBlue);

        effect.Texture = texture;

        foreach (var pass in effect.CurrentTechnique.Passes)
        {
            pass.Apply();
            GraphicsDevice.DrawUserPrimitives<VertexPositionTexture>(
                PrimitiveType.TriangleList,
                vertices,
                0,
                vertices.Length / 3
                );
        }
    }
}
using Microsoft.Xna.Framework;
using Microsoft.Xna.Framework.Graphics;

class MyGame : Game
{
    GraphicsDeviceManager graphics;
    BasicEffect effect;
    VertexPositionTexture[] vertices = new[]
    {
        new VertexPositionTexture(new Vector3(-1, 1, 0), new Vector2(0, 0)),
        new VertexPositionTexture(new Vector3(1, 1, 0), new Vector2(1, 0)),
        new VertexPositionTexture(new Vector3(1, -1, 0), new Vector2(1, 1)),

        new VertexPositionTexture(new Vector3(-1, 1, 0), new Vector2(0, 0)),
        new VertexPositionTexture(new Vector3(1, -1, 0), new Vector2(1, 1)),
        new VertexPositionTexture(new Vector3(-1, -1, 0), new Vector2(0, 1)),
    };
    Texture2D texture;

    public MyGame()
    {
        graphics = new GraphicsDeviceManager(this);
    }

    protected override void LoadContent()
    {
        effect = new BasicEffect(GraphicsDevice)
        {
            TextureEnabled = true,
            View = Matrix.CreateLookAt
            (
                new Vector3(0, 0, 3),   //カメラの位置
                new Vector3(0, 0, 0),   //カメラの見る点
                new Vector3(0, 1, 0)    //カメラの上向きベクトル
            ),
            Projection = Matrix.CreatePerspectiveFieldOfView
            (
                MathHelper.ToRadians(45),   //視野の角度。ここでは45°
                GraphicsDevice.Viewport.AspectRatio,//画面のアスペクト比(=横/縦)
                1,      //カメラからこれより近い物体は画面に映らない
                100     //カメラからこれより遠い物体は画面に映らない
            )
        };
        texture = Content.Load<Texture2D>("Content/explosion");
    }

    protected override void UnloadContent()
    {
        effect.Dispose();
    }

    protected override void Draw(GameTime gameTime)
    {
        GraphicsDevice.Clear(Color.CornflowerBlue);

        GraphicsDevice.BlendState = BlendState.Additive;
        effect.Texture = texture;

        foreach (var pass in effect.CurrentTechnique.Passes)
        {
            pass.Apply();
            GraphicsDevice.DrawUserPrimitives<VertexPositionTexture>(
                PrimitiveType.TriangleList,
                vertices,
                0,
                vertices.Length / 3
                );
        }
    }
}
using Microsoft.Xna.Framework;
using Microsoft.Xna.Framework.Graphics;

class MyGame : Game
{
    GraphicsDeviceManager graphics;
    BasicEffect effect;
    VertexPositionTexture[] vertices;
    Texture2D texture;

    public MyGame()
    {
        graphics = new GraphicsDeviceManager(this);

        const int particleCount = 20;
        vertices = new VertexPositionTexture[particleCount * 6];

        for (int i = 0; i < particleCount; i++)
        {
            vertices[i * 6 + 0] = new VertexPositionTexture(new Vector3(-1, 1, 0), new Vector2(0, 0));
            vertices[i * 6 + 1] = new VertexPositionTexture(new Vector3(1, 1, 0), new Vector2(1, 0));
            vertices[i * 6 + 2] = new VertexPositionTexture(new Vector3(1, -1, 0), new Vector2(1, 1));

            vertices[i * 6 + 3] = new VertexPositionTexture(new Vector3(-1, 1, 0), new Vector2(0, 0));
            vertices[i * 6 + 4] = new VertexPositionTexture(new Vector3(1, -1, 0), new Vector2(1, 1));
            vertices[i * 6 + 5] = new VertexPositionTexture(new Vector3(-1, -1, 0), new Vector2(0, 1));

            for (int j = 0; j < 6; j++)
            {
                vertices[i * 6 + j].Position *= 0.5f;
                vertices[i * 6 + j].Position += new Vector3(
                    (float)System.Math.Cos(2 * System.Math.PI * i / particleCount),
                    0,
                    (float)System.Math.Sin(2 * System.Math.PI * i / particleCount)
                    );
            }
        }

    }

    protected override void LoadContent()
    {
        effect = new BasicEffect(GraphicsDevice)
        {
            TextureEnabled = true,
            View = Matrix.CreateLookAt
            (
                new Vector3(0, 3, 3),   //カメラの位置
                new Vector3(0, 0, 0),   //カメラの見る点
                new Vector3(0, 1, 0)    //カメラの上向きベクトル
            ),
            Projection = Matrix.CreatePerspectiveFieldOfView
            (
                MathHelper.ToRadians(45),   //視野の角度。ここでは45°
                GraphicsDevice.Viewport.AspectRatio,//画面のアスペクト比(=横/縦)
                1,      //カメラからこれより近い物体は画面に映らない
                100     //カメラからこれより遠い物体は画面に映らない
            )
        };
        texture = Content.Load<Texture2D>("Content/explosion");
    }

    protected override void UnloadContent()
    {
        effect.Dispose();
    }

    protected override void Draw(GameTime gameTime)
    {
        GraphicsDevice.Clear(Color.CornflowerBlue);

        GraphicsDevice.BlendState = BlendState.Additive;
        GraphicsDevice.DepthStencilState = DepthStencilState.None;
        effect.Texture = texture;

        foreach (var pass in effect.CurrentTechnique.Passes)
        {
            pass.Apply();
            GraphicsDevice.DrawUserPrimitives<VertexPositionTexture>(
                PrimitiveType.TriangleList,
                vertices,
                0,
                vertices.Length / 3
                );
        }
    }
}
 [0回]
[0回]