[PR]
×
[PR]上記の広告は3ヶ月以上新規記事投稿のないブログに表示されています。新しい記事を書く事で広告が消えます。
プログラミング、3DCGとその他いろいろについて
[PR]上記の広告は3ヶ月以上新規記事投稿のないブログに表示されています。新しい記事を書く事で広告が消えます。
頂点にパフォーマンスを上げるVertexBufferがあるのと同じように
インデックスにもパフォーマンスを上げる(しかしめんどくさい)IndexBufferがあります。
using Microsoft.Xna.Framework;
using Microsoft.Xna.Framework.Graphics;


public class MyGame : Microsoft.Xna.Framework.Game
{
    GraphicsDeviceManager graphics;
    BasicEffect effect;

    VertexPositionColor[] vertices = new VertexPositionColor[4];
    VertexBuffer vertexBuffer;

    int[] indices = new int[6];
    IndexBuffer indexBuffer;


    public MyGame()
    {
        graphics = new GraphicsDeviceManager(this);
    }

    protected override void Initialize()
    {
        vertices[0] = new VertexPositionColor(new Vector3(1, 0, 0), Color.White);
        vertices[1] = new VertexPositionColor(new Vector3(-1, 0, 0), Color.Red);
        vertices[2] = new VertexPositionColor(new Vector3(0, 1, 0), Color.Navy);
        vertices[3] = new VertexPositionColor(new Vector3(0, -1, 0), Color.Navy);

        indices[0] = 0;
        indices[1] = 1;
        indices[2] = 2;
        indices[3] = 0;
        indices[4] = 3;
        indices[5] = 1;


        base.Initialize();
    }

    protected override void LoadGraphicsContent(bool loadAllContent)
    {
        if (loadAllContent)
        {
            effect = new BasicEffect(graphics.GraphicsDevice, null);
            effect.VertexColorEnabled = true;
            effect.Projection = Matrix.CreatePerspectiveFieldOfView(
                MathHelper.ToRadians(45),
                Window.ClientBounds.Width / (float)Window.ClientBounds.Height,
                1,
                100
                );
            effect.View = Matrix.CreateLookAt(
                new Vector3(0, 0, 3),
                new Vector3(0, 0, 0),
                new Vector3(0, 1, 0)
            );

            vertexBuffer = new VertexBuffer(
                graphics.GraphicsDevice,
                VertexPositionColor.SizeInBytes * vertices.Length,
                ResourceUsage.None
                );
            vertexBuffer.SetData<VertexPositionColor>(vertices);
            indexBuffer = new IndexBuffer(
                graphics.GraphicsDevice,
                sizeof(int) * indices.Length,
                ResourceUsage.None,
                IndexElementSize.ThirtyTwoBits
                );
            indexBuffer.SetData<int>(indices);
        }
    }

    protected override void Draw(GameTime gameTime)
    {
        graphics.GraphicsDevice.Clear(Color.CornflowerBlue);
        graphics.GraphicsDevice.VertexDeclaration = new VertexDeclaration(
            graphics.GraphicsDevice,
            VertexPositionColor.VertexElements
            );

        effect.Begin();
        foreach (EffectPass pass in effect.CurrentTechnique.Passes)
        {
            pass.Begin();
            graphics.GraphicsDevice.Vertices[0].SetSource(
                vertexBuffer,
                0,  //The starting offset.
                VertexPositionColor.SizeInBytes
                );
            graphics.GraphicsDevice.Indices = indexBuffer;
            graphics.GraphicsDevice.DrawIndexedPrimitives(
                PrimitiveType.TriangleList, //primitiveType
                0,  //baseIndex
                0,  //minVertexIndex
                vertices.Length,    //numVertices
                0,  //startIndex
                2   //primitiveCount
                );

            pass.End();
        }
        effect.End();
    }
}
見た目は普通に描画したときと全く変わりませんが、内部ではIndexBufferを使っており、
ほんの少しパフォーマンスがよくなっているはずです。
(しかしやはり、こういう単純な例では全くありがたみがありません。)
 [0回]
[0回]
小さなサンプルではその有効性はさっぱりわかりませんが、
大きなプログラムではGame.Initializeメソッドが
(グラフィックスで無い)データの初期化を分離するのに役に立ちます。
(これはちょうどjavaアプレットのinitメソッドのようなものです)
例えば座標データをこの中で初期化することが出来ます。
using Microsoft.Xna.Framework;
using Microsoft.Xna.Framework.Graphics;
public class MyGame : Microsoft.Xna.Framework.Game
{
GraphicsDeviceManager graphics;
BasicEffect effect;
VertexPositionColor[] vertices = new VertexPositionColor[3];
VertexBuffer vertexBuffer;
public MyGame()
{
graphics = new GraphicsDeviceManager(this);
}
protected override void Initialize()
{
vertices[0] = new VertexPositionColor(new Vector3(1, 0, 0), Color.White);
vertices[1] = new VertexPositionColor(new Vector3(-1, 0, 0), Color.Red);
vertices[2] = new VertexPositionColor(new Vector3(0, 1, 0), Color.Navy);
base.Initialize();
}
protected override void LoadGraphicsContent(bool loadAllContent)
{
if (loadAllContent)
{
effect = new BasicEffect(graphics.GraphicsDevice, null);
effect.VertexColorEnabled = true;
effect.Projection = Matrix.CreatePerspectiveFieldOfView(
MathHelper.ToRadians(45),
Window.ClientBounds.Width / (float)Window.ClientBounds.Height,
1,
100
);
effect.View = Matrix.CreateLookAt(
new Vector3(0, 0, 3),
new Vector3(0, 0, 0),
new Vector3(0, 1, 0)
);
vertexBuffer = new VertexBuffer(
graphics.GraphicsDevice,
VertexPositionColor.SizeInBytes * vertices.Length,
ResourceUsage.None
);
vertexBuffer.SetData<VertexPositionColor>(vertices);
}
}
protected override void Draw(GameTime gameTime)
{
graphics.GraphicsDevice.Clear(Color.CornflowerBlue);
graphics.GraphicsDevice.VertexDeclaration = new VertexDeclaration(
graphics.GraphicsDevice,
VertexPositionColor.VertexElements
);
effect.Begin();
foreach (EffectPass pass in effect.CurrentTechnique.Passes)
{
pass.Begin();
graphics.GraphicsDevice.Vertices[0].SetSource(
vertexBuffer,
0, //The starting offset.
VertexPositionColor.SizeInBytes
);
graphics.GraphicsDevice.DrawPrimitives(
PrimitiveType.TriangleList,
0, //startVertex
1 //primitiveCount
);
pass.End();
}
effect.End();
}
}
 (※前回と見た目は全く変わりません。)
ここでは今までコンストラクタ内で初期化していた
三角形の頂点データをMyGame.Initializeメソッド内で
初期化しています。
そのあとbase.InitializeでGame.Initializeメソッドを呼んでいます。
不可解です。
なぜスーパークラスのInitializeメソッドを呼ばなければならないのでしょう?
その理由はもちろんWindowsFormsのControl.OnPaintメソッドの
オーバーライドでスーパークラスのOnPaintメソッドを
呼んでやらなければならない理由と同じです。
つまり、Game.Initializeメソッドが何か大切なことをしているからです。
このケースでは、Game.InitializeメソッドはLoadGraphicsContentメソッドを呼んでおり、
base.Initialize
を忘れるとグラフィックス関係のオブジェクトが全て初期化されずにnullのままで、
描画すると同時に例外(NullReferenceException)が飛びます。
(同様に、DrawメソッドとUpdateメソッドも本当はスーパークラスの
メソッドを呼んでやらなければなりません。
しかしGameComponentを使わない限りは大して問題はないですし
これはサンプルなので割愛しました。
実際に問題が出る時に対処しても遅くは無いでしょう。
YAGNIの原則です。)
これはまぁいいでしょう。
しかしなぜ一番最後にbase.Initializeを呼んでいるのでしょうか?
コンストラクタは普通基底クラスのものから先に呼ばれます。
派生して出来たクラスのコンストラクタで基底クラスの何かを
利用するときに困らないようになっているのです。
とすると同じ初期化を表すInitializeメソッドも一番最初に
base.Initializeを呼ぶべきであるようにも思えます。
一番最後に呼ぶのではまるでデストラクタです。
また、WindowsFormsのControl.OnPaintメソッドも、
普通は基底クラスのOnPaintメソッドを一番最初に呼びます。
この2つのケースを考えると、一番最後にbase.Initializeとするのは
気持ち悪いように思えます。
なぜ一番最後に呼ぶのでしょう?
まず一番最初に呼ぶとどうなるかを実際に見るのがいいかもしれません。
・・・何も表示されません。
どうなっているのでしょう?
実はこれは一つ目の疑問と関係しています。
Game.InitializeメソッドはLoadGraphicsContentを呼んでいるので、
一番最初にGame.Initializeメソッドを呼ぶと
まだ三角形の頂点データが初期化されていないまま
VertexBufferが初期化されてしまうのです。
したがってVertexBufferの中はカラッポ。
何も表示されないというわけです。
[0回]
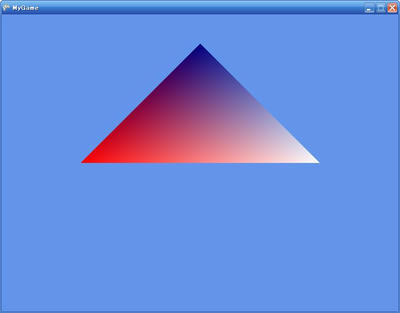
ここまで三角形や四角形を描くのに
GraphicsDevice.DrawUserPrimitivesジェネリックメソッドを使ってきました。
これはシンプルではあるのですがパフォーマンスがあまりよくありません。
良いパフォーマンスを持っているのは
GraphicsDevice.DrawPrimitivesメソッドです。
ただし、これは頂点データの配列そのものは直接使えません。
配列からVertexBufferを作り、それを使わねばならないのです。
(複雑で、はっきり言ってサンプル向きではありません。
しかし全く扱わないわけにも行かないでしょう)
public class MyGame : Microsoft.Xna.Framework.Game
{
GraphicsDeviceManager graphics;
BasicEffect effect;
VertexPositionColor[] vertices = new VertexPositionColor[3];
VertexBuffer vertexBuffer;
public MyGame()
{
graphics = new GraphicsDeviceManager(this);
vertices[0] = new VertexPositionColor(new Vector3(1, 0, 0), Color.White);
vertices[1] = new VertexPositionColor(new Vector3(-1, 0, 0), Color.Red);
vertices[2] = new VertexPositionColor(new Vector3(0, 1, 0), Color.Navy);
}
protected override void LoadGraphicsContent(bool loadAllContent)
{
if (loadAllContent)
{
effect = new BasicEffect(graphics.GraphicsDevice, null);
effect.VertexColorEnabled = true;
effect.Projection = Matrix.CreatePerspectiveFieldOfView(
MathHelper.ToRadians(45),
Window.ClientBounds.Width / (float)Window.ClientBounds.Height,
1,
100
);
effect.View = Matrix.CreateLookAt(
new Vector3(0, 0, 3),
new Vector3(0, 0, 0),
new Vector3(0, 1, 0)
);
vertexBuffer = new VertexBuffer(
graphics.GraphicsDevice,
VertexPositionColor.SizeInBytes * vertices.Length,
ResourceUsage.None
);
vertexBuffer.SetData<VertexPositionColor>(vertices);
}
}
protected override void Draw(GameTime gameTime)
{
graphics.GraphicsDevice.Clear(Color.CornflowerBlue);
graphics.GraphicsDevice.VertexDeclaration = new VertexDeclaration(
graphics.GraphicsDevice,
VertexPositionColor.VertexElements
);
effect.Begin();
foreach (EffectPass pass in effect.CurrentTechnique.Passes)
{
pass.Begin();
graphics.GraphicsDevice.Vertices[0].SetSource(
vertexBuffer,
0, //The starting offset.
VertexPositionColor.SizeInBytes
);
graphics.GraphicsDevice.DrawPrimitives(
PrimitiveType.TriangleList,
0, //startVertex
1 //primitiveCount
);
pass.End();
}
effect.End();
}
}
effect.Begin();
foreach (EffectPass pass in effect.CurrentTechnique.Passes)
{
pass.Begin();
//1回目
graphics.GraphicsDevice.Vertices[0].SetSource(
vertexBuffer1,
0,
VertexPositionColor.SizeInBytes
);
graphics.GraphicsDevice.DrawPrimitives(
PrimitiveType.TriangleList,
0,
1
);
//2回目
graphics.GraphicsDevice.Vertices[0].SetSource(
vertexBuffer2,
0,
VertexPositionColor.SizeInBytes
);
graphics.GraphicsDevice.DrawPrimitives(
PrimitiveType.TriangleList,
0,
1
);
pass.End();
}
effect.End();
[0回]
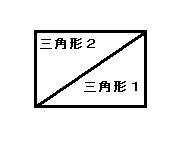
ここでは少し話を戻して普通の四角形を表示します。
四角形を表示するためには三角形を2つ組み合わせます。
この調子でどんな複雑な図形も
三角形を組み合わせることで描画できます。
using Microsoft.Xna.Framework;
using Microsoft.Xna.Framework.Graphics;
public class MyGame : Microsoft.Xna.Framework.Game
{
GraphicsDeviceManager graphics;
BasicEffect effect;
VertexPositionColor[] vertices = new VertexPositionColor[6];
public MyGame()
{
graphics = new GraphicsDeviceManager(this);
vertices[0] = new VertexPositionColor(new Vector3(0, 1, 0), Color.Navy);
vertices[1] = new VertexPositionColor(new Vector3(1, 0, 0), Color.White);
vertices[2] = new VertexPositionColor(new Vector3(-1, 0, 0), Color.Red);
vertices[3] = new VertexPositionColor(new Vector3(1, 0, 0), Color.White);
vertices[4] = new VertexPositionColor(new Vector3(0, -1, 0), Color.Navy);
vertices[5] = new VertexPositionColor(new Vector3(-1, 0, 0), Color.Red);
}
protected override void LoadGraphicsContent(bool loadAllContent)
{
if (loadAllContent)
{
effect = new BasicEffect(graphics.GraphicsDevice, null);
effect.VertexColorEnabled = true;
effect.Projection = Matrix.CreatePerspectiveFieldOfView(
MathHelper.ToRadians(45),
Window.ClientBounds.Width / (float)Window.ClientBounds.Height,
1,
100
);
effect.View = Matrix.CreateLookAt(
new Vector3(0, 0, 3),
new Vector3(0, 0, 0),
new Vector3(0, 1, 0)
);
}
}
protected override void Draw(GameTime gameTime)
{
graphics.GraphicsDevice.Clear(Color.CornflowerBlue);
graphics.GraphicsDevice.VertexDeclaration = new VertexDeclaration(
graphics.GraphicsDevice,
VertexPositionColor.VertexElements
);
effect.Begin();
foreach (EffectPass pass in effect.CurrentTechnique.Passes)
{
pass.Begin();
graphics.GraphicsDevice.DrawUserPrimitives<VertexPositionColor>(
PrimitiveType.TriangleList,
vertices,
0, //vertexOffset
2 //primitiveCount
);
pass.End();
}
effect.End();
}
}

このプログラムは6つの頂点を使って2つの三角形を描いています。
MyGame.DrawメソッドのDrawUserPrimitivesに注目してください。
このprimitiveCount引数が1から2に変わっています。
これは三角形の数を1から2に変えたからです。
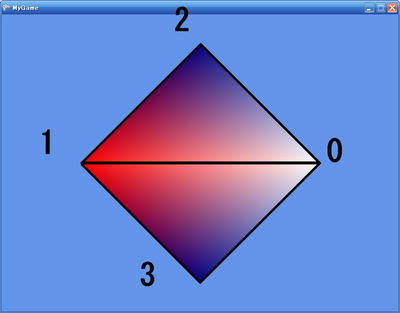
さて、このコードには気持ち悪いところがあります。
頂点のデータの重複です。
四角形を書くのに必要な頂点は4つです。
6つも必要ありません。2つは無駄です。
重複は良いプログラムの天敵です。
何とかして取り除かなければなりません。
そうするにはGraphicsDevice.DrawUserIndexedPrimitivesメソッドを使います。
これを使うと、頂点データは4つだけで済みます。
そのかわり、四角形を構成する三角形の
頂点のインデックスを6つ指定してやります。
ここで言うインデックスというのは、4つのうち
何番目の頂点を使うのかということです。
頂点データの代わりにインデックスが2つの三角形を指定するのです。
using Microsoft.Xna.Framework;
using Microsoft.Xna.Framework.Graphics;
public class MyGame : Microsoft.Xna.Framework.Game
{
GraphicsDeviceManager graphics;
BasicEffect effect;
VertexPositionColor[] vertices = new VertexPositionColor[4];
int[] indices = new int[6];
public MyGame()
{
graphics = new GraphicsDeviceManager(this);
vertices[0] = new VertexPositionColor(new Vector3(1, 0, 0), Color.White);
vertices[1] = new VertexPositionColor(new Vector3(-1, 0, 0), Color.Red);
vertices[2] = new VertexPositionColor(new Vector3(0, 1, 0), Color.Navy);
vertices[3] = new VertexPositionColor(new Vector3(0, -1, 0), Color.Navy);
indices[0] = 0;
indices[1] = 1;
indices[2] = 2;
indices[3] = 0;
indices[4] = 3;
indices[5] = 1;
}
protected override void LoadGraphicsContent(bool loadAllContent)
{
if (loadAllContent)
{
effect = new BasicEffect(graphics.GraphicsDevice, null);
effect.VertexColorEnabled = true;
effect.Projection = Matrix.CreatePerspectiveFieldOfView(
MathHelper.ToRadians(45),
Window.ClientBounds.Width / (float)Window.ClientBounds.Height,
1,
100
);
effect.View = Matrix.CreateLookAt(
new Vector3(0, 0, 3),
new Vector3(0, 0, 0),
new Vector3(0, 1, 0)
);
}
}
protected override void Draw(GameTime gameTime)
{
graphics.GraphicsDevice.Clear(Color.CornflowerBlue);
graphics.GraphicsDevice.VertexDeclaration = new VertexDeclaration(
graphics.GraphicsDevice,
VertexPositionColor.VertexElements
);
effect.Begin();
foreach (EffectPass pass in effect.CurrentTechnique.Passes)
{
pass.Begin();
graphics.GraphicsDevice.DrawUserIndexedPrimitives<VertexPositionColor>(
PrimitiveType.TriangleList,
vertices,
0, //vertexOffset
vertices.Length, //numVertices
indices, //indexData
0, //indexOffset
2 //primitiveCount
);
pass.End();
}
effect.End();
}
}
[0回]
ここまではアニメーションを行いましたが
これだけではもちろんゲームになりません。
ゲームはプレイヤーの入力に反応してこそゲームです。
そうでなければよく出来たデジタルアニメーションに過ぎません。
XNAの入力する方法には
1.ゲームパッド
2.キーボード
3.マウス
の3つがあります。
ここではキーボード入力をあつかいます。
(他の2つも似たようなものです。インテリセンスの助けがあれば問題なく出来ます。)
using Microsoft.Xna.Framework;
using Microsoft.Xna.Framework.Input;


public class MyGame : Game
{
    protected override void Update(GameTime gameTime)
    {
        KeyboardState keyboardState = Keyboard.GetState();

        if (keyboardState.IsKeyDown(Keys.Space))
        { Window.Title = "Space key is pressed."; }
        else
        { Window.Title = ""; }
    }
}
public class MyGame : Microsoft.Xna.Framework.Game
{
GraphicsDeviceManager graphics;
BasicEffect effect;
VertexPositionColor[] vertices = new VertexPositionColor[3];
float angle = 0;
public MyGame()
{
graphics = new GraphicsDeviceManager(this);
vertices[0] = new VertexPositionColor(new Vector3(1, 1, 0), Color.Navy);
vertices[1] = new VertexPositionColor(new Vector3(0, 0, 0), Color.White);
vertices[2] = new VertexPositionColor(new Vector3(-1, 1, 0), Color.Red);
}
protected override void LoadGraphicsContent(bool loadAllContent)
{
if (loadAllContent)
{
effect = new BasicEffect(graphics.GraphicsDevice, null);
effect.VertexColorEnabled = true;
effect.Projection = Matrix.CreatePerspectiveFieldOfView(
MathHelper.ToRadians(45),
Window.ClientBounds.Width / (float)Window.ClientBounds.Height,
1,
100
);
}
}
protected override void Update(GameTime gameTime)
{
KeyboardState keyboardState = Keyboard.GetState();
if (keyboardState.IsKeyDown(Keys.Left))
{
angle -= 0.01f;
}
if (keyboardState.IsKeyDown(Keys.Right))
{
angle += 0.01f;
}
}
protected override void Draw(GameTime gameTime)
{
graphics.GraphicsDevice.Clear(Color.CornflowerBlue);
graphics.GraphicsDevice.VertexDeclaration = new VertexDeclaration(
graphics.GraphicsDevice,
VertexPositionColor.VertexElements
);
graphics.GraphicsDevice.RenderState.CullMode = CullMode.None;
effect.View = Matrix.CreateLookAt(
new Vector3(3 * (float)Math.Sin(angle), 0, 3 * (float)Math.Cos(angle)),
new Vector3(0, 0, 0),
new Vector3(0, 1, 0)
);
effect.Begin();
foreach (EffectPass pass in effect.CurrentTechnique.Passes)
{
pass.Begin();
graphics.GraphicsDevice.DrawUserPrimitives<VertexPositionColor>(
PrimitiveType.TriangleList,
vertices,
0,
1
);
pass.End();
}
effect.End();
}
}
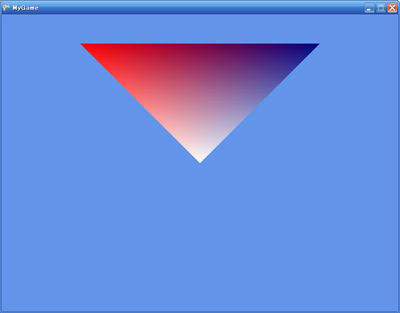 最初の状態
最初の状態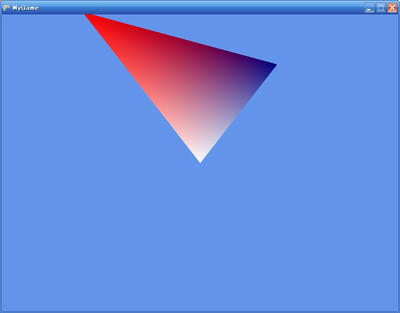 「←」キーを押したとき。カメラは左に。
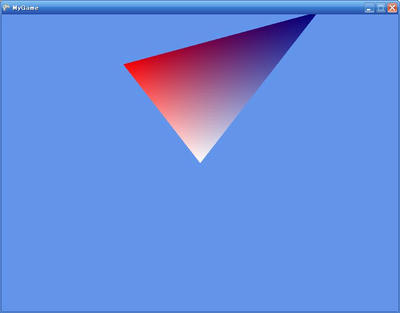 「→」キーを押したとき。カメラは右に。
[0回]